
What is Docker Engine?
Docker Engine is a tool that allows developers, sys-admins etc. to easily deploy their applications in a sandbox (called containers) to run on the host operating system i.e. Linux. The key benefit of Docker Engine is that it allows users to package an application with all of its dependencies into a standardized unit for software development. Unlike virtual machines, containers do not have the overhead of a full operating system and hence enable more efficient usage of the underlying system and resources.
What are containers?
The industry standard today is to use Virtual Machines (VMs) to run software applications. VMs run applications inside a guest Operating System, which runs on virtual hardware powered by the server’s host OS.
VMs are great at providing full operating system isolation for applications: there are very few ways a problem in the host operating system can affect the software running in the guest operating system, and vice-versa. But this isolation comes at great cost — the computational overhead spent virtualizing hardware for a guest OS to use is substantial.
Containers take a different approach: by leveraging the low-level mechanics of the host operating system, containers provide most of the isolation of virtual machines at a fraction of the computing power.
What will this tutorial teach me?
This tutorial aims to be the one-stop shop for getting your hands dirty with Docker. Apart from demystifying the Docker landscape, it’ll give you hands-on experience with building and deploying your own webapps. You’ll quickly build a multi-container voting app using multiple languages. Even if you have no prior experience with deployments, this tutorial should be all you need to get started.
Using this Document
This document contains a series of several sections, each of which explains a particular aspect of Docker. In each section, you will be typing commands (or writing code). All the code used in the tutorial is available in the Github repo.
Preface
Note: This tutorial uses version 1.10.1 of Docker. If you find any part of the tutorial incompatible with a future version, please raise an issue. Thanks!
Prerequisites
There are no specific skills needed for this tutorial beyond a basic comfort with the command line and using a text editor. Prior experience in developing web applications will be helpful but is not required. As you proceed further along the tutorial, we’ll make use of Docker Hub
Setting up your computer
Getting all the tooling setup on your computer can be a daunting task, but thankfully getting Docker up and running on your favorite OS has become very easy.
The getting started guide on Docker has detailed instructions for setting up Docker on Mac, Linux and Windows. Once you are done installing Docker, test your Docker installation by running the following:
$ docker run hello-world
Unable to find image 'hello-world:latest' locally
latest: Pulling from library/hello-world
03f4658f8b78: Pull complete
a3ed95caeb02: Pull complete
Digest: sha256:8be990ef2aeb16dbcb9271ddfe2610fa6658d13f6dfb8bc72074cc1ca36966a7
Status: Downloaded newer image for hello-world:latest
Hello from Docker. This message shows that your installation appears to be working correctly.
...
1. 0 Playing with Alpine
Now that you have everything setup, it’s time to get our hands dirty. In this section, you are going to run a Alpine Linuxcontainer (a lightweight linux distribution) on our system and get a taste of the -+docker run+- command.
To get started, let’s run the following in our terminal:
$ docker pull alpine
Note: Depending on how you’ve installed docker on your system, you might see a -+permission denied+- error after running the above command. If you’re on a Mac, verify your installation. If you’re on Linux, you may need to prefix your -+docker+- commands with -+sudo+-. Alternatively you can create a docker group to get rid of this issue.
The -+pull+- command fetches the alpine image from the Docker registry and saves it in our system. You can use the -+docker images+- command to see a list of all images on your system.
$ docker images
REPOSITORY              TAG                 IMAGE ID            CREATED             VIRTUAL SIZE
alpine                 latest              c51f86c28340        4 weeks ago         1.109 MB
hello-world             latest              690ed74de00f        5 months ago        960 B
1.1. 1 Docker Run
Great! Let’s now run a Docker container based on this image. To do that you are going to use the -+docker run+- command.
$ docker run alpine ls -l
total 48
drwxr-xr-x    2 root     root          4096 Mar  2 16:20 bin
drwxr-xr-x    5 root     root           360 Mar 18 09:47 dev
drwxr-xr-x   13 root     root          4096 Mar 18 09:47 etc
drwxr-xr-x    2 root     root          4096 Mar  2 16:20 home
drwxr-xr-x    5 root     root          4096 Mar  2 16:20 lib
...... ......
What happened? Behind the scenes, a lot of stuff happened. When you call -+run+-, the Docker client finds the image (alpine in this case), creates the container and then runs a command in that container. When you run -+docker run alpine+-, you provided a command (-+ls -l+-), so Docker started the command specified and you saw the listing.
Let’s try something more exciting.
$ docker run alpine echo "hello from alpine"
hello from alpine
OK, that’s some actual output. In this case, the Docker client dutifully ran the -+echo+- command in our alpine container and then exited it. If you’ve noticed, all of that happened pretty quickly. Imagine booting up a virtual machine, running a command and then killing it. Now you know why they say containers are fast!
Try another command.
$ docker run alpine uptime
00:16:48 up  1:48,  0 users,  load average: 0.00, 0.01, 0.04
Try another command.
$ docker run alpine /bin/sh
Wait, nothing happened! Is that a bug? Well, no. These interactive shells will exit after running any scripted commands, unless they are run in an interactive terminal - so for this example to not exit, you need to -+docker run -it alpine /bin/sh+-.
You are now inside the container shell and you can try out a few commands like -+ls -l+-, -+uptime+- and others. Exit out of the container by giving the -+exit+- command.
Ok, now it’s time to see the -+docker ps+- command. The -+docker ps+- command shows you all containers that are currently running.
$ docker ps
CONTAINER ID        IMAGE               COMMAND             CREATED             STATUS              PORTS               NAMES
Since no containers are running, you see a blank line. Let’s try a more useful variant: -+docker ps -a+-
$ docker ps -a
CONTAINER ID        IMAGE               COMMAND                  CREATED             STATUS                      PORTS               NAMES
36171a5da744        alpine              "/bin/sh"                5 minutes ago       Exited (0) 2 minutes ago                        fervent_newton
305297d7a235        alpine             "uptime"                  5 minutes ago       Exited (0) 4 minutes ago                        distracted_goldstine
a6a9d46d0b2f        alpine             "echo 'hello from alp"    6 minutes ago       Exited (0) 6 minutes ago                        lonely_kilby
ff0a5c3750b9        alpine             "ls -l"                   8 minutes ago       Exited (0) 8 minutes ago                        elated_ramanujan
c317d0a9e3d2        hello-world         "/hello"                 34 seconds ago      Exited (0) 12 minutes ago                       stupefied_mcclintock
What you see above is a list of all containers that you ran. Notice that the -+STATUS+- column shows that these containers exited a few minutes ago. You’re probably wondering if there is a way to run more than just one command in a container. Let’s try that now:
$ docker run -it alpine /bin/sh
/ # ls
bin      dev      etc      home     lib      linuxrc  media    mnt      proc     root     run      sbin     sys      tmp      usr      var
/ # uptime
05:45:21 up  5:58,  0 users,  load average: 0.00, 0.01, 0.04
Running the -+run+- command with the -+-it+- flags attaches us to an interactive tty in the container. Now you can run as many commands in the container as you want. Take some time to run your favorite commands.
Danger Zone: If you’re feeling particularly adventurous you can try -+rm -rf /bin+- in the container. Make sure you run this command in the container and not in your laptop. Doing this will not make any other commands like -+ls+- and -+grep+-work. Once everything stops working, you can exit the container and then start it up again with the -+docker run -it alpine sh+- command. Since Docker creates a new container every time, everything should start working again.
That concludes a whirlwind tour of the -+docker run+- command which would most likely be the command you’ll use most often. It makes sense to spend some time getting comfortable with it. To find out more about -+run+-, use -+docker run --help+-to see a list of all flags it supports. As you proceed further, we’ll see a few more variants of -+docker run+-.
1.2. 2 Terminology
In the last section, you saw a lot of Docker-specific jargon which might be confusing to some. So before you go further, let’s clarify some terminology that is used frequently in the Docker ecosystem.
- Images - The Filesystem and configuration of our application which are used to create containers. To find out more about a Docker image, run -+docker inspect alpine+-. In the demo above, you used the -+docker pull+- command to download the alpine image. When you executed the command -+docker run hello-world+-, it also did a -+docker pull+-behind the scenes to download the hello-world image.
- Containers - Created using Docker images and run the actual application. You created a container using -+docker run+-which you did using the alpine image that you downloaded. A list of running containers can be seen using the -+docker ps+- command.
- Docker daemon - The background service running on the host that manages building, running and distributing Docker containers.
- Docker client - The command line tool that allows the user to interact with the Docker daemon.
- Docker Hub - A registry of Docker images. You can think of the registry as a directory of all available Docker images. You’ll be using this later in this tutorial.
2. 0 Webapps with Docker
Great! So you have now looked at -+docker run+-, played with a docker container and also got a hang of some terminology. Armed with all this knowledge, you are now ready to get to the real-stuff i.e. deploying web applications with Docker.
2.1. 1 Static Sites
Let’s start by taking baby-steps. The first thing we’re going to look at is how you can run a dead-simple static website. You’re going to pull a docker image from the docker hub, run the container and see how easy it so to set up a webserver.
The image that you are going to use is a single-page website that was already created for this demo and is available on the Docker Hub as -+seqvence/static-site+-. You can download and run the image directly in one go using -+docker run+-.
$ docker run seqvence/static-site
Since the image doesn’t exist on your Docker host, the Docker daemon will first fetch the image from the registry and then run the image. Okay, now that the server is running, do you see the website? What port is it running on? And more importantly, how do you access the container directly from our host machine?
In this case, the client didn’t tell the Docker Engine to publish any of the ports so you need to re-run the -+docker run+-command. We’ll take the oportunity to publish ports and pass your name to the container to customize the message displayed. While we are at it, you should also find a way so that our terminal is not attached to the running container. So that you can happily close your terminal and keep the container running. This is called the detached mode.
Before we look at the detached mode, we should first find out a way to stop the container that you have just launched.
First up, launch another terminal (command window) and execute the following command. If you’re using docker-machine you need to run -+eval $(docker-machine env )+- in each new terminal otherwise you’ll get the error “Cannot connect to the Docker daemon. Is the docker daemon running on this host?”.
$ docker ps
CONTAINER ID        IMAGE                  COMMAND                  CREATED             STATUS              PORTS               NAMES
a7a0e504ca3e        seqvence/static-site   "/bin/sh -c 'cd /usr/"   28 seconds ago      Up 26 seconds       80/tcp, 443/tcp     stupefied_mahavira
Check out the -+CONTAINER ID+- column. You will need to use this -+CONTAINER ID+- value, a long sequence of characters and first stop the running container and then remove the running container as given below. The example below provides the -+CONTAINER ID+- on our system, you should use the value that you see in your terminal.
$ docker stop a7a0e504ca3e
$ docker rm   a7a0e504ca3e
Note: A cool feature is that you do not need to specify the entire -+CONTAINER ID+-. You can just specify a few starting characters and if it is unique among all the containers that you have launched, the Docker client will intelligently pick it up.
Now, let us launch a container in detached mode as shown below:
$ docker run --name static-site -e AUTHOR="Your Name" -d -P seqvence/static-site
e61d12292d69556eabe2a44c16cbd54486b2527e2ce4f95438e504afb7b02810
In the above command, -+-d+- will create a container with the process detached from our terminal, -+-P+- will publish all the exposed container ports to random ports on the Docker host, -+-e+- is how you pass environment variables to the container, and finally -+--name+- allows you to specify a container name. -+AUTHOR+- is the environment variable name and -+Your Name+- is the value that you can pass
Now you can see the ports by running the -+docker port+- command.
$ docker port static-site
443/tcp -> 0.0.0.0:32772 80/tcp -> 0.0.0.0:32773
If you’re on Linux, you can open http://localhost:32773 (replace 32773 with your port for 80/tcp) in your browser. If you’re on Windows or a Mac, you need to find the IP of the hostname.
$ docker-machine ip default
192.168.99.100
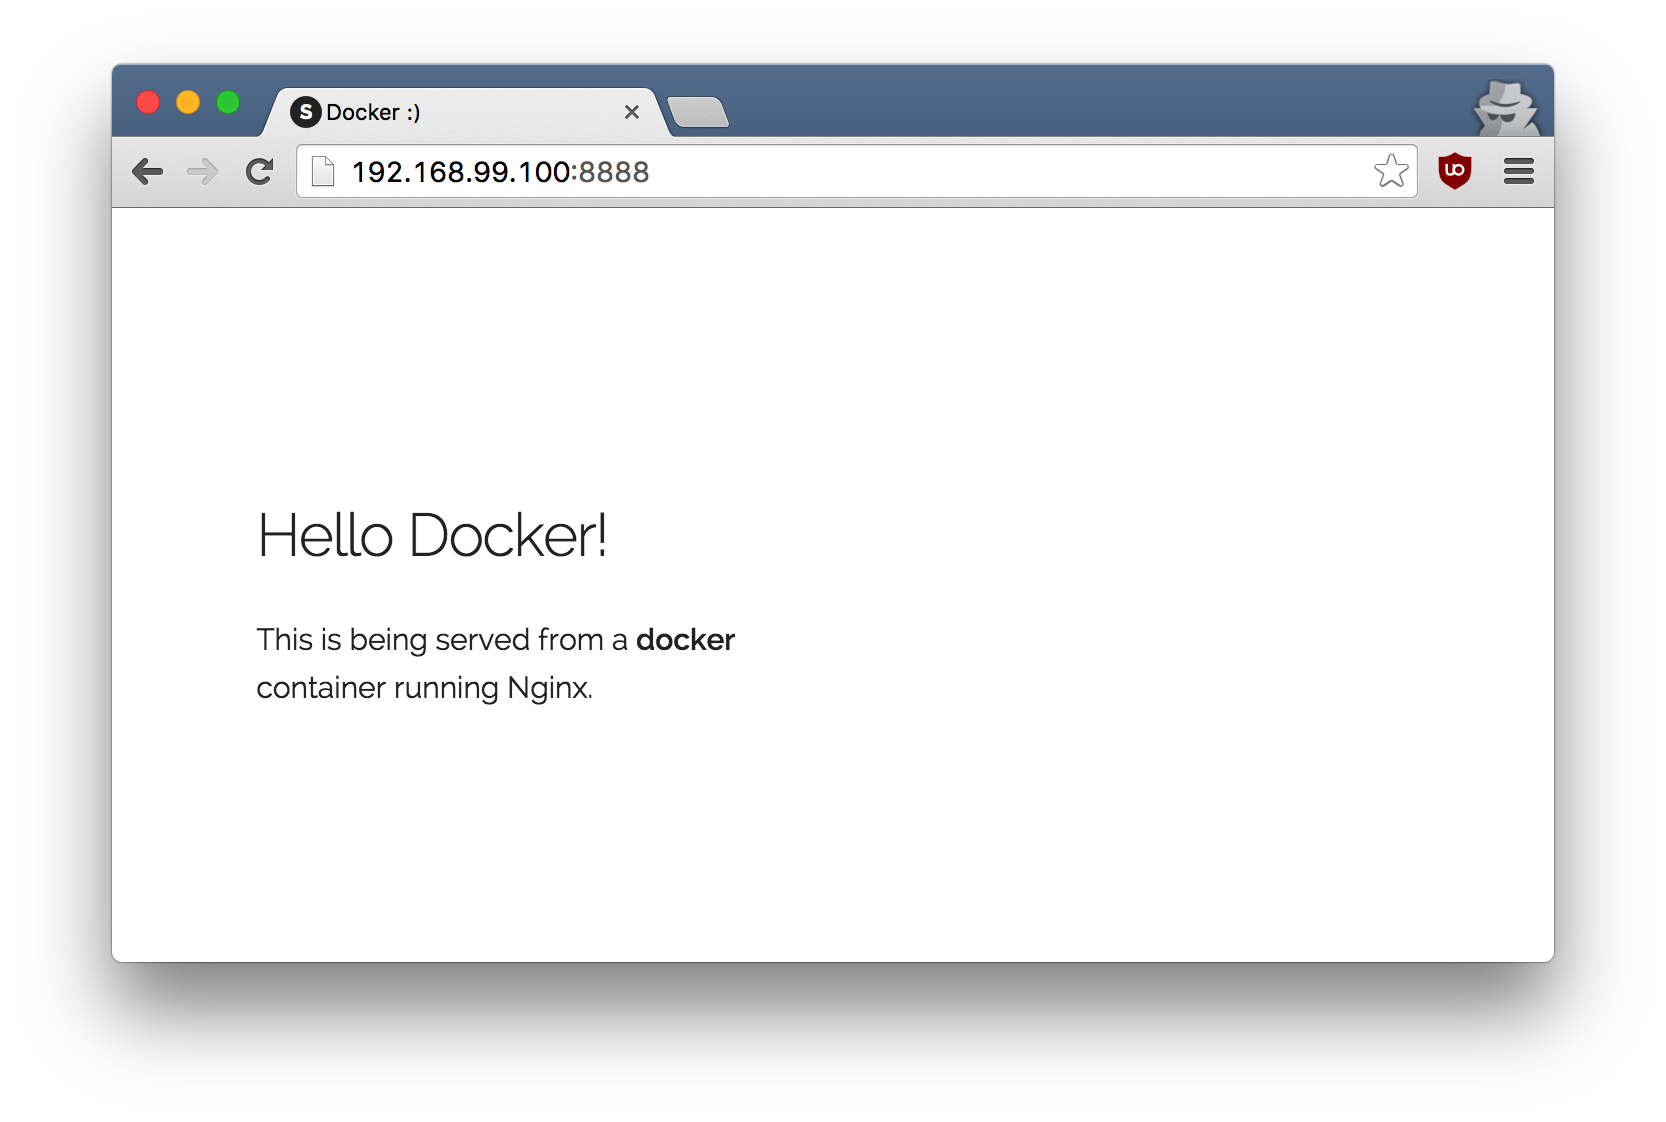
You can now open http://192.168.99.100:32773 (replace 32773 with your port for 80/tcp) to see your site live!
You can also run a second webserver at the same time, specifying a custom host port mapping to the container’s webserver.
$ docker run --name static-site-2 -e AUTHOR="Your Name" -d -p 8888:80 seqvence/static-site
![]()
I’m sure you agree that was super simple. To deploy this on a real server you would just need to install docker, and run the above docker command.
Now that you’ve seen how to run a webserver inside a docker image, you must be wondering - how do I create my own docker image? This is the question we’ll be exploring in the next section. But first, let’s stop and remove the containers since you won’t be using them anymore.
$ docker stop static-site static-site-2
$ docker rm static-site static-site-2
2.2. 2 Docker Images
You’ve looked at images before but in this section we’ll dive deeper into what docker images are and build our own image. And, we’ll also use that image to run our application locally. Finally, you’ll push some of your images to Docker Hub.
Docker images are the basis of containers. In the previous example, you pulled the seqvence/static-site image from the registry and asked the docker client to run a container based on that image. To see the list of images that are available locally, use the -+docker images+- command.
$ docker images
REPOSITORY             TAG                 IMAGE ID            CREATED             SIZE seqvence/static-site   latest
92a386b6e686        2 hours ago        190.5 MB nginx                  latest
af4b3d7d5401        3 hours ago        190.5 MB python                 2.7
1c32174fd534        14 hours ago        676.8 MB postgres               9.4
88d845ac7a88        14 hours ago        263.6 MB containous/traefik     latest
27b4e0c6b2fd        4 days ago          20.75 MB node                   0.10
42426a5cba5f        6 days ago          633.7 MB redis                  latest
4f5f397d4b7c        7 days ago          177.5 MB mongo                  latest
467eb21035a8        7 days ago          309.7 MB alpine                 3.3
70c557e50ed6        8 days ago          4.794 MB java                   7
21f6ce84e43c        8 days ago          587.7 MB
The above gives a list of images that I’ve pulled from the registry and the ones that I’ve created myself (we’ll shortly see how). The list will most likely not correspond to the list of images that you have currently on your machine. The -+TAG+- refers to a particular snapshot of the image and the -+ID+- is the corresponding unique identifier for that image.
For simplicity, you can think of an image akin to a git repository - images can be committed with changes and have multiple versions. When you do not provide a specific version number, the client defaults to -+latest+-.
For example, you can pull a specific version of -+ubuntu+- image as follows:
$ docker pull ubuntu:12.04
NOTE: Do not execute the above command. It is only for your reference.
If you do not specify the version number of the image, then as mentioned the Docker client will default to a version named -+latest+-.
So for example, the -+docker pull+- command given below will pull an image named -+ubuntu:latest+-:
$ docker pull ubuntu
To get a new Docker image you can either get it from a registry (such as the docker hub) or create your own. There are tens of thousands of images available on Docker hub. You can also search for images directly from the command line using -+docker search+-.
An important distinction to be aware of when it comes to images is between base and child images.
- Base images are images that has no parent image, usually images with an OS like ubuntu, alpine or debian.
- Child images are images that build on base images and add additional functionality.
Then there are two more types of images that can be both base and child images, they are official and user images.
- Official images Docker, Inc. sponsors a dedicated team that is responsible for reviewing and publishing all Official Repositories content. This team works in collaboration with upstream software maintainers, security experts, and the broader Docker community. These are not prefixed by an organization or user name. In the list of images above, the -+python+-, -+node+-, -+alpine+- and -+nginx+- images are official (base) images. To find out more about them, check out the Official Images Documentation.
- User images are images created and shared by users like you. They build on base images and add additional functionality. Typically these are formatted as -+user/image-name+-. The -+user+- value in the image name is your Docker Hub user or organization name.
2.3. 3 Our First Image
Now that you have a better understanding of images, it’s time to create our own. Our goal in this section will be to create an image that sandboxes a small Flask application. For the purposes of this workshop, we’ll created a fun little Python Flask app that displays a random cat -+.gif+- every time it is loaded - because you know, who doesn’t like cats?
2.4. 4 Dockerfile
A Dockerfile is a text-file that contains a list of commands that the Docker daemon calls while creating an image. It is simple way to automate the image creation process. The best part is that the commands you write in a Dockerfile are almostidentical to their equivalent Linux commands. This means you don’t really have to learn new syntax to create your own Dockerfiles.
The goal of this exercise is to create a Docker image which will run a Flask app.
Start by creating a folder -+flask-app+- where we’ll create the following files:
- Dockerfile
- app.py
- requirements.txt
- templates/index.html
Create the app.py with the following content:
from flask
import Flask, render_template
import random
app = Flask(name)  # list of cat images
images =
     "http://ak-hdl.buzzfed.com/static/2013-10/enhanced/webdr05/15/9/anigif_enhanced-buzz-26388-1381844103-11.gif",
     "http://ak-hdl.buzzfed.com/static/2013-10/enhanced/webdr01/15/9/anigif_enhanced-buzz-31540-1381844535-8.gif",
     "http://ak-hdl.buzzfed.com/static/2013-10/enhanced/webdr05/15/9/anigif_enhanced-buzz-26390-1381844163-18.gif",
     "http://ak-hdl.buzzfed.com/static/2013-10/enhanced/webdr06/15/10/anigif_enhanced-buzz-1376-1381846217-0.gif",
     "http://ak-hdl.buzzfed.com/static/2013-10/enhanced/webdr03/15/9/anigif_enhanced-buzz-3391-1381844336-26.gif",
     "http://ak-hdl.buzzfed.com/static/2013-10/enhanced/webdr06/15/10/anigif_enhanced-buzz-29111-1381845968-0.gif",
     "http://ak-hdl.buzzfed.com/static/2013-10/enhanced/webdr03/15/9/anigif_enhanced-buzz-3409-1381844582-13.gif",
     "http://ak-hdl.buzzfed.com/static/2013-10/enhanced/webdr02/15/9/anigif_enhanced-buzz-19667-1381844937-10.gif",
     "http://ak-hdl.buzzfed.com/static/2013-10/enhanced/webdr05/15/9/anigif_enhanced-buzz-26358-1381845043-13.gif",
     "http://ak-hdl.buzzfed.com/static/2013-10/enhanced/webdr06/15/9/anigif_enhanced-buzz-18774-1381844645-6.gif",
     "http://ak-hdl.buzzfed.com/static/2013-10/enhanced/webdr06/15/9/anigif_enhanced-buzz-25158-1381844793-0.gif",
     "http://ak-hdl.buzzfed.com/static/2013-10/enhanced/webdr03/15/10/anigif_enhanced-buzz-11980-1381846269-1.gif"

@app.route('/')
def index():
     url = random.choice(images)
     return render_template('index.html', url=url)


if name == "main":
     app.run(host="0.0.0.0")
In order to install Python modules required for our app we need to add to requirements.txt file the following line:
Flask==0.10.1
Create a directory called -+templates+- and create a index.html file in that directory, to have the same content as below:
The next step now is to create a Docker image with this web app. As mentioned above, all user images are based off a base image. Since our application is written in Python, we will build our own Python image based on Alpine. We’ll do that using a Dockerfile.
Create a file Dockerfile. Start by specifying our base image. Use the -+FROM+- keyword to do that
FROM alpine:latest
The next step usually is to write the commands of copying the files and installing the dependencies. But first we will install the Python pip package to the alpine linux distribution. This will not just install the pip package but any other dependencies too, which includes the python interpreter. Add the following RUN command next:
RUN apk add --update py-pip
Next, let us add the files that make up the Flask Application.
Install all Python requirements for our app to run. This will be accomplished by adding the lines:
COPY requirements.txt /usr/src/app/
RUN pip install --no-cache-dir -r /usr/src/app/requirements.txt
Copy the files you have created earlier our image by using COPY command.
COPY app.py /usr/src/app/
COPY templates/index.html /usr/src/app/templates/
The next thing you need to specify is the port number which needs to be exposed. Since our flask app is running on -+5000+-that’s what we’ll expose.
EXPOSE 5000
The last step is the command for running the application which is simply - -+python ./app.py+-. Use the CMD command to do that -
CMD "python", "/usr/src/app/app.py"
The primary purpose of -+CMD+- is to tell the container which command it should run by default when it is started. With that, our -+Dockerfile+- is now ready. This is how it looks:
# our base image FROM alpine:latest# Install python and pip RUN apk add --update py-pip # install Python modules needed by the Python app COPY requirements.txt /usr/src/app/ RUN pip install --no-cache-dir -r /usr/src/app/requirements.txt # copy files required for the app to run COPY app.py /usr/src/app/ COPY templates/index.html /usr/src/app/templates/ # tell the port number the container should expose EXPOSE 5000 # run the application CMD "python", "/usr/src/app/app.py"
Now that you finally have your -+Dockerfile+-, you can now build your image. The -+docker build+- command does the heavy-lifting of creating a docker image from a -+Dockerfile+-.
While running the -+docker build+- command given below, make sure to replace -++- with your username. This username should be the same on you created when you registered on Docker hub. If you haven’t done that yet, please go ahead and create an account. The -+docker build+- command is quite simple - it takes an optional tag name with -+-t+- and a location of the directory containing the -+Dockerfile+- - the -+.+- indicates the current directory:
$ docker build -t /myfirstapp .
Sending build context to Docker daemon 9.728 kB
Step 1 : FROM alpine:latest
   --> 0d81fc72e790
Step 2 : RUN apk add --update py-pip
   --> Running in 8abd4091b5f5
  fetch http://dl-4.alpinelinux.org/alpine/v3.3/main/x86_64/APKINDEX.tar.gz
  fetch http://dl-4.alpinelinux.org/alpine/v3.3/community/x86_64/APKINDEX.tar.gz (1/12)
  Installing libbz2 (1.0.6-r4) (2/12)  Installing expat (2.1.0-r2) (3/12)
  Installing libffi (3.2.1-r2) (4/12)  Installing gdbm (1.11-r1) (5/12)
  Installing ncurses-terminfo-base (6.0-r6) (6/12)
  Installing ncurses-terminfo (6.0-r6) (7/12)
  Installing ncurses-libs (6.0-r6) (8/12)
  Installing readline (6.3.008-r4) (9/12)
  Installing sqlite-libs (3.9.2-r0) (10/12)
  Installing python (2.7.11-r3) (11/12)
  Installing py-setuptools (18.8-r0) (12/12)
  Installing py-pip (7.1.2-r0)
  Executing busybox-1.24.1-r7.trigger
  OK: 59 MiB in 23 packages
   --> 976a232ac4ad
  Removing intermediate container 8abd4091b5f5
Step 3 : COPY requirements.txt /usr/src/app/
   --> 65b4be05340c  Removing intermediate container 29ef53b58e0f
Step 4 : RUN pip install --no-cache-dir -r /usr/src/app/requirements.txt
   --> Running in a1f26ded28e7
  Collecting Flask==0.10.1 (from -r /usr/src/app/requirements.txt (line 1))
    Downloading Flask-0.10.1.tar.gz (544kB)
  Collecting Werkzeug>=0.7 (from Flask==0.10.1->-r /usr/src/app/requirements.txt (line 1))
    Downloading Werkzeug-0.11.4-py2.py3-none-any.whl (305kB)
  Collecting Jinja2>=2.4 (from Flask==0.10.1->-r /usr/src/app/requirements.txt (line 1))
    Downloading Jinja2-2.8-py2.py3-none-any.whl (263kB)
  Collecting itsdangerous>=0.21 (from Flask==0.10.1->-r /usr/src/app/requirements.txt (line 1))
    Downloading itsdangerous-0.24.tar.gz (46kB)
  Collecting MarkupSafe (from Jinja2>=2.4->Flask==0.10.1->-r /usr/src/app/requirements.txt (line 1))
    Downloading MarkupSafe-0.23.tar.gz
  Installing collected packages: Werkzeug, MarkupSafe, Jinja2, itsdangerous, Flask
    Running setup.py install for MarkupSafe
    Running setup.py install for itsdangerous
    Running setup.py install for Flask
  Successfully installed Flask-0.10.1 Jinja2-2.8 MarkupSafe-0.23 Werkzeug-0.11.4 itsdangerous-0.24  You are using pip version 7.1.2, however version 8.1.1 is available. You should consider upgrading via the 'pip install --upgrade pip' command.
   --> 8de73b0730c2  Removing intermediate container a1f26ded28e7
Step 5 : COPY app.py /usr/src/app/
   --> 6a3436fca83e  Removing intermediate container d51b81a8b698
Step 6 : COPY templates/index.html /usr/src/app/templates/
   --> 8098386bee99  Removing intermediate container b783d7646f83
Step 7 : EXPOSE 5000
  --> Running in 31401b7dea40
   --> 5e9988d87da7  Removing intermediate container 31401b7dea40
Step 8 : CMD python /usr/src/app/app.py
   --> Running in 78e324d26576
   --> 2f7357a0805d  Removing intermediate container 78e324d26576
Successfully built 2f7357a0805d
Note, the Alpine Linux CDN has been experiencing some trouble recently. If you encounter an error building this image, there’s a workaround as outlined in issue #104. This is also reflected currently in the repo for the Flask app
If you don’t have the -+alpine:latest+- image, the client will first pull the image and then create your image. Therefore, your output on running the command will look different from mine. If everything went well, your image should be ready! Run -+docker images+- and see if your image (-+/myfirstapp+-) shows.
The last step in this section is to run the image and see if it actually works.
$ docker run -p 8888:5000 --name myfirstapp YOUR_USERNAME/myfirstapp
 * Running on http://0.0.0.0:5000/ (Press CTRL+C to quit)
Head over to -+http://:8888+- and your app should be live. You may need to open up another terminal and determine the container ip address using -+docker-machine ip default+-.![]()

Hit the Refresh button in the web browser to see a few more cat images.
OK, now that you are done with the this container, stop and remove it since you won’t be using it again.
Open another terminal window and execute the following commands:
$ docker stop myfirstapp
$ docker rm myfirstapp
2.5. 5 Docker Networking
- The default network is given a name based on the “project name”, which is based on the name of the directory it lives in (e.g. my-app-name_default). You can override the project name with either the --project-name flag or the COMPOSE_PROJECT_NAME environment variable.
- Services are referable by their service name defined in the Dockerfile
- If any containers have connections open to the old container, they will be closed. It is a container’s responsibility to detect this condition, look up the name again and reconnect.
- Custom networks can be created with the top-level networks key and used for more complex topologies, application isolation, different drivers and external network connections
- https://docs.docker.com/compose/networking/
3. 0 Docker Training
This portion of the tutorial will guide you through the creation and customization of a voting app. It’s important that you follow the steps in order, and make sure to customize the portions that are customizable.
Important. To complete the submission, you will need to have Docker and Docker Compose installed on your machine as mentioned in the Prerequisites and Setup sections. You’ll also need to have a Docker Id. Once you do run login from the commandline:
$ docker login
And follow the login directions. Now you can push images to Docker Hub.
Note: If you encounter an error response from daemon while attempting to login, you may need to restart your machine by running -+docker-machine restart +-.
3.1. 1 Get the voting-app
You now know how to build your own Docker image, so let’s take it to the next level and glue things together. For this app you have to run multiple containers and Docker Compose is the best way to do that.
Start by quickly reading the documentation available here.
Clone the voting-app repository already available at Github Repo.
git clone https://github.com/docker/docker-birthday-3.git
3.2. 2 Customize the app
3.2.1. 1 Modify app.py
In the folder -+example-voting-app/voting-app+- you need to edit the app.py and change the two options for the programming languages you chose.
Edit the following lines:
option_a = os.getenv('OPTION_A', "One") option_b = os.getenv('OPTION_B', "Two")
to look like:
option_a = os.getenv('OPTION_A', "Python") option_b = os.getenv('OPTION_B', "Javascript")
3.2.2. 2 Modify config.json
Modifying the config.json is important when validating your completion of the Docker Birthday Training. File is located in -+example-voting-app/result-app/views+- directory.
This is what the file looks now like:
{
   "name":"Gordon",
   "twitter":"@docker",
   "location":"San Francisco, CA, USA",
   "repo":"example/votingapp_voting-app","example/votingapp_result-app",
   "vote":"Cat"
}
Replace it with your data:
{
   "name":"John Doe",
   "twitter":"@YOUR_TWITTER_HANDLER",
   "location":"San Francisco, CA, USA",
   "repo":"YOUR_DOCKER_ID/votingapp_voting-app","YOUR_DOCKER_ID/votingapp_result-app",
   "vote":"Python"
}
3.2.3. 3 Running your app
Now, run your application. To do that, we’ll use Docker Compose. Docker Compose is a tool for defining and running multi-container Docker applications. With Compose, you define a -+.yml+- file that describes all the containers and volumes that you want, and the networks between them. In the example-voting-app directory, you’ll see a -+docker-compose.yml file+-:
version: "2"
services:
  voting-app:
    build: ./voting-app/.
    volumes:
     - ./voting-app:/app
    ports:
      - "5000:80"
    networks:
      - front-tier
      - back-tier
  result-app:
    build: ./result-app/.
    volumes:
      - ./result-app:/app
    ports:
      - "5001:80"
    networks:
      - front-tier
      - back-tier
  worker:
    image: manomarks/worker
    networks:
      - back-tier
  redis:
    image: redis:alpine
    container_name: redis
    ports: "6379"
    networks:      - back-tier
  db:
    image: postgres:9.4
    container_name: db
    volumes:
      - "db-data:/var/lib/postgresql/data"
    networks:
      - back-tier
volumes:
  db-data:
networks:
  front-tier:
  back-tier:
This Compose file defines
- A voting-app container based on a Python image
- A result-app container based on a Node.js image
- A redis container based on a redis image, to temporarily store the data.
- A Java based worker app based on a Java image
- A Postgres container based on a postgres image
Note that two of the containers are built from Dockerfiles, while the other three are images on Docker Hub. To learn more about how they’re built, you can examine each of the Dockerfiles in the two directories: -+voting-app+-, -+result-app+-. We included the code for the Java worker in -+worker+- but pre-built the image to save on downloads.
The Compose file also defines two networks, front-tier and back-tier. Each container is placed on one or two networks. Once on those networks, they can access other services on that network in code just by using the name of the service. To learn more about networking check out the Networking with Compose documentation.
To launch your app navigate to the example-voting-app directory and run the following command:
$ docker-compose up -d
This tells Compose to start all the containers specified in the -+docker-compose.yml+- file. The -+-d+- tells it to run them in daemon mode, in the background.
Last you’ll need to figure out the ip address of your Docker host. If you’re running Linux, it’s just localhost, or 127.0.0.1. If you’re using Docker Machine on Mac or Windows, you’ll need to run:
$ docker-machine ip default
It’ll return an IP address. If you only have one Docker Machine running, most likely, that’s 192.168.99.100. Navigate to -+http://192.168.99.100:5000+- in your browser, and you’ll see the voting app, something like this:![]()
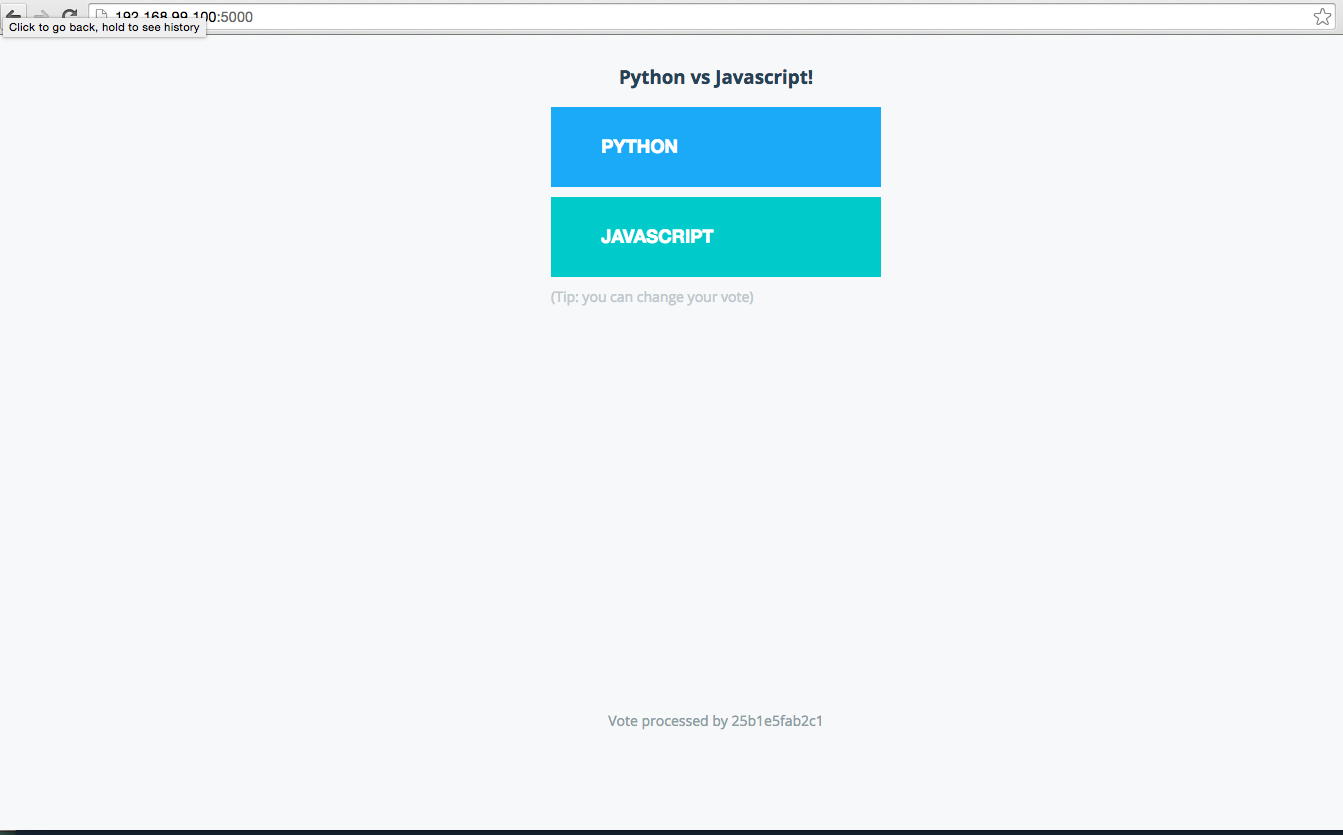
Click on one to vote.